Thursday, May 1, 2014

Whole30 Day One :)

Day one wooo!!! For breakfast I made an omelette filled with spicy seasoned chicken, mushrooms and spinach. I used the other half of the spicy chicken I made to put on my salad for lunch at work. My number one tip for a good omelette? Don't be afraid you're going to burn your eggs. Chances are you won't, and if you try to fold it too early you'll ruin the whole thing. 
The omelette consists of 3 free range eggs, three mushrooms, a handful of spinach, and 1/3 pound of spicy chicken. Saute the mushrooms first, then start to cook the egg :)
The salad is one whole romaine lettuce heart, three chopped mushrooms, homemade mayo, one whole avocado, half of a cucumber, handful of cherry tomatoes, and 2/3 pound of spicy chicken :) Man was it good. I also had a anjou pear with it for lunch.


For dinner day one, I baked some chicken thighs that I got some New Seasons. Usually I buy my chicken from Trader Joes. Both places offer free range organic chicken without antibiotics. But the New Seasons chicken was literally the best I've ever had. I'm still drooling over it just thinking about it. I paired it with some baked asparagus and sweet potato 'fries' :) 


Look at that beautiful baked good-ness!


And those insanely crispy looking potatoes :)


Chicken:

1-2 pounds chicken thighs
Salt to taste
Garlic powder to taste
Whatever other spice you prefer
Roughly 2 tablespoons olive oil.


  • Toss all the ingredients in a large ziploc bake and mix until all thighs are evenly coated. Lay out on a cookie sheet and pop in the oven at 350F degrees for roughly 20 minutes :) enjoy.  


Asparagus and Sweet Potatoes:

These are pretty simple. Cut off the ends of the asparagus, and slice sweet potatoes into fry shapes. Toss both in plenty of olive oil, lay out on pan like so, and bake :) Sprinkle with salt if you would like.


Wednesday, April 30, 2014

May Whole30 from It Starts With Food :)

What is the Whole30 you say? Well first, do yourself a favor and go out and pick yourself up a copy of It Starts With Food by Dallas and Melissa Hartwig. This book has really helped me in so many ways, and not in the cheesy infomercial "THIS WILL CHANGE YOUR LIFE" product advertisement kind of way. Allow me to tell you a story.


Once upon a time in Happy Valley, Oregon, my father and I lived in a small apartment overlooking the Clackamas Town Center. The move out there was such a struggle let me tell you. My father had been living in a house out in Gresham, and I in SE Portland. The amount of things that him and I had collectively was ridiculous and certainly would not fit in such a small area so we had to invest in a storage unit. Potentially the larger struggle was attempting to remain organized moving with a father suffering from Alzheimer's disease. The first few days after the move were the hardest. I still had my regular work schedule to uphold, as well as organize the entire apartment in a simple manner that left all of the items my father regularly uses in an easy to access place. I figured I would sift through all of our stuff and thin out the amount of unneeded items once we were settled. Luckily as time went on the apartment became organized and less crowded with items, unfortunately for my father however this caused such a great deal of stress that around these few months his disease took a sharp decline. We would argue senselessly over where the tupperware without lids went, or why I got rid of plates with large cracks and chunks missing. We would argue about food as I tried to help him eat as healthy as I was. The thing for people with Alzheimer's is that they may understand that something is different or missing, but may not understand why even if it makes perfect sense to the rest of us. During this time in my life, it was like I was slowly drowning in quiet chaos. No life preserver or land in sight. I needed something to keep me from completely going under which is when I found my new gym.

I have always been into sports and athletics, so when my boss told me about a gym that is directly across from the mall that my apartment overlooked I was pumped. I came in one day and checked it out and immediately signed up. It had a pool and plenty of free weights, just what I needed to escape for a little while. I would walk over from my apartment almost every day even if it was raining. I started to truly love and appreciate that time with myself and for myself. A little while into my membership there a position as a swim coordinator opened up and they asked me to come in and apply for the position. I met with the manager and soon accepted the position :) I was nervous about having two jobs but excited for this new opportunity. As I began working I met some really lovely people and their children, and I was really loving my job. I soon began coaching the swim team as well and that is when this job turned into so much more than a job. All of the kids that I coached made me feel more like myself again, and that I could really survive this hardship in my life and make the best of it. That's when I met Timmy and his family. I filled in for a beginner swimming class and taught a small group of three year old's water safety skills and had some fun to get them acclimated to the water. Little Timmy was one of the students in this class and after the weeks were over his mother approached me asking about private lessons. I immediately agreed and we began having lessons each week. Timmy was such an amazing student, tentative and shy at first, but always smiling and willing to try the task at hand. After our lessons I would  chat with Leslie his mother, and the rest of their family. Eventually we developed this close relationship where I was excited to see and teach Timmy as well as spend a little time with his mother. We discovered that her and I had each had major stress in our life that had led us to eating healthier food in the search for some relief. She talked about how her husband had bought her this book about how foods effect your digestive system, and that they explain it in a science-y way and a simplistic way. It had really helped her and forever changed her diet and she really felt like it would help me. The next time I saw her she had actually bought the book for me and before I had even read it, it held so much sentimental value for me.

It took me less than a week to read the book and I was convinced it was my turn to do the Whole30. I made sure that I understood all of the aspects really well and began my first one on September 1st 2013. The lows sucked, but then the feeling after about two and a half weeks was like nothing I had ever felt. I just felt so fresh and shiny and new! My insides felt like they were doing their job properly for the first time that I could even remember. The Whole30 is something that will stick around in my life for a long time. The first time it totally changed my relationship with food and my view on my own digestive health. I have Leslie and her family to thank for that, as well as Dallas and Melissa for writing such a fantastic book. And to all my favorite swim families at East Side who have helped me mentally through the tough times as well :)

Alright sappy moment over. So I am going to write about my second experience with the Whole30 this time on my blog because, health. Follow me along on my journey with some fantastic food and recipes and a written account of my experience. I'll try to write each day but, we will see how well that works out haha.

OH! also added bonus, my work has decided to have an office May Whole30! Go Team!


I thoroughly recommend that you check out the websites associated with It Starts With Food, and poke around for yourself what its all about. You won't regret it :)

This link will take you to the Whole 9 page, the 9 factors for health

This link will take you to the Whole30 page


Friday, April 25, 2014

Orange Muffins with Dark Berry Pecan Crumbs :)

Still working through this big box of oranges from my work, and experimenting with different flavor combos so get used to seeing a few more orange related recipes :) On Sunday I did an orange poppy seed, yesterday I decided to do orange berry, based off the popular lemon blueberry bars or muffins.

I really like to take a simple recipe as a base for more complex creations. I actually have a book where I write down "ratios" essentially. Each type of dessert has different ratios for flour to fat to sugar to egg and such. Cakes and cupcakes need a batter that is higher in liquids than cookies for example in order to rise and be light and fluffy. Cookies need less liquid and more flour in order to hold their round shape while baking. Now I am grossly over simplifying this, so i'll expand more on this later in a separate post, but you get the idea :) ANYWAYS so on to my point, I used my basic "white cake" recipe and added some ingredients and free handed the crumb topping and they turned out quite well. Every once in a while these experiments don't turn out as well as I would hope, so if you are feeling adventurous and your endeavor doesn't turn out that well, I hope you can find comfort in the fact that I've had baking fails as well :)


Check out that fresh squeezed orange juice on the right. Have you ever had fresh squeezed orange juice in the mornings with your breakfast? Cause let me tell you that it is such a lovely simple pleasure. Or orange carrot juice which is my favorite and I highly recommend it if you have a juicer. Or orange carrot pineapple...

On the left is the orange juice with coconut milk, the real stuff! From a can! (it would come directly from a coconut if I had access to that) Don't use coconut milk from a carton. Just please don't do it. I mean I guess if you are in a pinch go ahead and use it. But no one needs all of the added sugars and artificial sweeteners and "nutrients". Coconut is sweet naturally, the less sugar you eat the more you can taste that. So go for canned coconut  milk. It is only 99 cents where I live, how can you beat that price? So moving on, there is something so appealing to my taste buds about orange and cream together. It reminds me of those orange creamsicle ice cream bars that our grade school would give out for "ice cream Fridays" if our class completed all of our homework or if we were well behaved and what not. Ah nostalgia. 


I mentioned it on my last post, but when you are using any sort of citrus fruit in a recipe that calls for zest and juice from said fruit, always zest first! And zest the shit out of it too. You can never have too much zest. Except in key lime pie, then you can certainly have too much zest. I happened to use all the zest in the picture above, and that's about two oranges worth. I like to get into the pith when I zest, not just the initial layer on the outside. Pith, for those of you who don't know is the white stuff on the peel in oranges, lemons, and limes. It has lots of nutrients and sounds like a kid with a lisp saying 'piss' which I find amusing :) And another thing about nutrition and such. BUY FREE RANGE EGGS. Or cage free, or open air. Whatever they are listed as in your neck of the woods. I'm talking about the eggs that come from chickens that are not factory farmed. Chickens that are free to eat the bugs naturally found in their environment and have enough space to roam without bumping into one another and that are not fed hormones and antibiotics. The nice thing about living in Portland is that even though it is a city, there are several families who raise chickens and sell their chicken eggs to other residents in town. For cheap too! These eggs taste better, and you can actually taste the difference. You can feel it as well, the egg shells are much harder to crack. Alright though, enough life advice for how to buy your eggs...haha. 


Printable Recipe :)

Orange Muffins:
Dry:
3 cups almond flour
1 cup tapioca starch
1.5 tablespoons of baking powder
a pinch of sea salt
Wet:
1 cup organic raw sugar
6 tablespoons coconut oil, melted
4 eggs
4 teaspoons vanilla
1 cup canned organic coconut milk
zest from two oranges
juice from two oranges.
Dark Berry Crumb Topping:
2 cups frozen berries (I used an organic 'northwest' mix from my grocery store that included blue berries, black berries and raspberries)
1/2 cup tapioca starch
1 cup crushed pecans
1/2 cup almond flour
1/2 cup (or less) raw organic brown sugar (demerara)
1/2 cup creamed coconut. AKA coconut butter. Softened but not melted. 

Directions!
Preheat oven to 350 degrees Fahrenheit, grease two muffin pans.
  1. Stir all dry ingredients together in a bowl.
  2. In a separate bowl add melted coconut oil and sugar. Stir until grainy like the picture to the right.
  3. Add eggs one at a time, followed by vanilla, coconut milk, and orange juice.
  4. Combine the liquid and flour mixture, stir until well combined.
  5. Here is everyone's favorite part (unless you're freaked out by raw eggs) taste the batter. Just a small dip. Get a sense for how much orange flavor you taste. If you want a lot more orange flavor add all of the zest. If you want a more subtle flavor add half the zest and continue to add and taste until you reach your desired flavor :)
  6. Fill muffin cups half full.
  7. Prepare the berry mixture by melting the frozen berries until they are soft. Squish them with a fork. Add the tapioca starch until you reach a 'gel' type consistency. 
  8. Dribble the berry mix onto the surface of the muffins.
  9. In a small bowl stir the pecans, flour, and sugar. Then cut in the creamed coconut like you would for butter in a pie crust. 
  10. Sprinkle the crumble ix on top of each of the muffins and then place in the oven! 
  11. Cook for roughly 15 minutes. 


Gooey hidden berry center of deliciousness :)


Tuesday, April 22, 2014

Orange Poppy Seed Cake

This last weekend was Easter weekend. Saturday morning my work held an Easter egg hunt and breakfast for the community which I always enjoy being a part of. Over the course of the week prior I had helped stuff thousands of eggs full of chocolates for the little ones, and my perfectionist tendencies for matching colors made my co-workers roll their eyes. I see nothing wrong with aesthetically pleasing color arrangements, however I'm sure no little kid will even notice, but I know that they match and that's enough for me.


I helped out at the food table for the egg hunt because duh. At work I'm always picked to do anything with food because I enjoy it and I talk about it enough that I think most of my peers tune me out until I mention 'cupcakes' or 'cookies'. None are too interested in the 'healthy talk'. Anyway I decided to play around with my food display a bit, knowing full well it would soon be destroyed by the voraciously hungry flocks of humans. My greatest piece of food architecture was this yogurt pyramid. Many of the tiny humans thought it was funny to try to destroy the structure by taking yogurt from the bottom. BUT! Their attempts were no match for this pyramids fortitude and the integrity of the structure remained! Until all the yogurt was gone of course. I had some fun with the bananas as well :) I have always been a fan of presentation and I can miss an opportunity :)


Nearly all the eggs are already gone!

We had so many oranges left over from the egg hunt that I took an entire box home with me. Immediately I began to scour my favorite food website TasteSpotting, for inspiration for orange flavored treats to make for Easter dessert. I came across a few orange poppy seed combinations which I thought was ingenious considering lemon poppy seed is a well know and well liked pair. So Easter morning I started baking my famous Snicker Doodles that were requested by my boyfriends aunt, and this lovely cake :) I also made a lightly sweet coconut cream drizzle to top this cake :)

Orange Poppy Seed Cake:
Dry:
2 cups almond flour
1 cup tapioca starch
1 1/2 teaspoon baking powder
1 teaspoon salt
3 Tablespoons poppy seeds

Wet:
1 cup coconut cream (from a can, I get mine at trader joes :) )
6 Tablespoons coconut oil, melted but not hot
1 cup organic unrefined sugar
4 eggs
3/4 cups fresh squeezed orange juice, roughly two large oranges.
1 teaspoon vanilla extract
orange zest to desired taste, I used roughly 1.5 of an orange. 


Coconut Cream Drizzle:

Left over coconut cream from the can (about 1/2 to 3/4 of a cup)
1/2 cup of sugar or less
Orange zest. 

IMPORTANT TIPS: Zest the orange before juicing it. It might seem obvious but some people don't think of that. Also if you place the orange in the fridge for an hour before juicing it, it will yield more juice :)

Preheat oven to 350 degrees F. Spray a bundt cake pan with coconut oil*

  1. Mix all dry ingredients together in a large bowl.
  2. Melt the coconut oil, make sure that it is not hot before you use it in the recipe. I usually melt more coconut oil then I need, because its much easier to measure it as a liquid than a solid.
  3. Stir coconut oil and sugar together in a separate bowl. Add the eggs one at a time to temper. 
  4. Next scoop the coconut cream from your can and melt slightly in the microwave for about 30 seconds. Add the 1 cup to the egg mixture. Again make sure the coconut cream is not hot or you will cook the eggs.
  5. Stir in vanilla, orange juice, and orange zest. 
  6. Blend the dry mix with the wet mix until combined and free of any lumps. 
  7. Now pour the batter into your bundt pan and place in the oven :) Cook for one hour or until toothpick comes out clean. 
  8. Prepare the coconut cream drizzle while the cake is baking. Simply mix the three ingredients together. Add as much zest as you would like. I personally enjoy the taste of coconut cream without sugar, so I add even less then 1/2 cup  if it is just me eating it, or omit it all together. It is totally up to your taste :)
  9. Once the cake has cooled, drizzle the coconut cream on top and serve :)

* : SUPER VERY IMPORTANT!!! OMG READ THIS: So I thought that this cake was a fail. I didn't even bring it in to share with my boyfriends family because I didn't want to share a fail cake with everyone. It was stuck to the pan and I just could not get it out and I thought that surely it had to suck. So when I returned home I decided to try to cut it out and hope to salvage it. IT ACTUALLY SLICED OUT SO EASILY. And tastes amazing! So the lesson here today kids. Be generous with your coconut oil spray.


yummy goodness :) ENJOY


Friday, March 7, 2014

Candied pecan dark chocolate cacao nib cookies :)

Anyone watch Jenna Marbles on YouTube? She has a few episodes of "better names for animals" or other topics. Today I bring you better names for rooms in a house. Have you ever thought about how each room in the house is named after the item that you enter that room for? Bedroom, Bathroom, Computer room, etc. With two exceptions, one being the living or family room when it should really be called the couch room, and the kitchen. I declared to my family while stirring up these cookies yesterday that I will now refer to the kitchen as the cooking room, or the feeding room or the baking room. Because I'm literal, and funny. Or at least I think so :)

So, I love dark chocolate. Like. LOOOOOVE IT. As dark as you can get. If you don't love dark chocolate we can no longer be friends. And if you prefer milk chocolate over dark chocolate, you can just see your way out. Now that we have that cleared up. Imagine dark chocolate chips paired with raw chocolate (cacao), and compiled into a cinnamon-y cookie. Grab a paper towel, you're drooling. :) I haven't even gotten to the second best part: candied pecans. If you buy candied pecans, you're stupid, and I mean it. They are so STUPIDLY simple to make that even a caveman could do it (dated Geico commercial reference).

Candied pecans:

Preheat oven to 350, leave on if you're making the cookies after these babies.

Pecans
Ginger
Nutmeg
Honey

Recipe:

I did not measure anything, (surprise surprise) so don't worry about measuring either.


  1. Pour desired amount of pecans in a bowl. If I had to guess I used about 3-4 cups.
  2. Sprinkle with desired amount of ginger and nutmeg (or whatever spices you like). Stir.
  3. Pour in honey (maple syrup works as well). I like things less sweet, so I didn't use much honey, and you don't want it to be overly gooey either. So perhaps 2-3 tablespoons. 
  4. Stir it all together and pour onto baking sheet covered in tinfoil. Spread them out a little with a fork, and pop into the oven for five minutes. Pull them out and shift them around a bit on the sheet, then return to the oven for another ~7 minutes. More if you like them extra toasty. 


Ta-Da! you did it. Easy as pie right? Pecan pie HA!

On to the cookies. You want to wait until the pecans have cooled enough for the honey to no longer be sticky before you use them for the cookies. This will not take long, for all you impatient people out there. Although I have a stand mixer, these cookies work well with just a whisk and your hands if you're lazy like me and prefer less dishes. Also, I didn't own a stand mixer or even a hand held one when I began baking, so sometimes its nice to go back to basics.


Candied pecan dark chocolate cacao nib cookies:
(this is my base chocolate chip cookie recipe that I modify :) )

Preheat to 350 degrees F.

1/2 cup coconut oil, melted completely
1 1/2 cups organic raw sugar (if using honey or maple syrup, use 1 cup)
2 eggs
1 tablespoon vanilla

2 cups almond flour
1 cup tapioca starch
1 teaspoon baking soda
1 teaspoon sea salt
2 teaspoons cinnamon

Chopped candied pecans (recipe above)
Cacao nibs
Dark chocolate chips


  1. In a large bowl stir together all dry ingredients.
  2. In a smaller bowl whisk coconut oil and sugar.
  3. Add eggs one by one into the coconut oil and sugar. If your coconut oil is hot and your eggs are straight from the fridge it is not ideal to mix them, however if you must the faster you whisk the better. Get in the habit of warming eggs to room temp! Add vanilla.
  4. Combine the wet ingredients with the dry ingredients, combine as well as you can with a spoon, then use your hands :)
  5. Once combined, chop your candied pecans from earlier and add them into the bowl. Add as much or as little as you like, I used roughly 1 1/2 cup for a double batch. 
  6. Add a handful of cacao nibs and however many dark chocolate chips you prefer :) knead together in one large cookie dough ball.
  7. Roll 2 inch drops in your hand and place them on a cookie sheet. Flatten with your hand or the bottom of a glass before placing in the oven.
  8. Bake for ~12-16 minutes or until desired gooey-ness!


I made just about 70 cookies and brought them to my work and then my MMA gym, and they were gone even before Crossfit was over!

Enjoy! I'd love to hear about other ways you have modified the timeless chocolate chip cookie recipe to make them unique! 


Tuesday, December 18, 2012

Caramel Apple Crisple

One oddly named post following another. I realize that I cook a lot of things that don’t fit neatly into a well-known category that bloggers would instantly recognize. I love it though, because I feel like I am inventing something new :) and maybe this will be my blogger thing? Too early in the game to tell, its like when people try and give themselves a nick-name, ugh who does that, so obnoxious right? Hehe.

On to the crisple! I think I am really in the Christmas spirit or something, because this name sounds winter-y and Christmas-y to me. It is merely just my pairing of the word crumble and crisp. Where TMZ concocts Brangelina, I stir up crisple :)

In all seriousness, this recipe came to me from a bit of a mash up as well. I found this brilliant apple crisp recipe on tastespotting probably a couple months ago. I always bookmark things after I make them based on their taste, and also write the recipe in my little cooking journal mess of scribbles. I cannot find the apple crisp in my bookmarks nor can I relocate the website on tastespotting! Mystery blogger wherever you went, thank you for a lovely base to my crisple.

So I had some left over apples from my last trip to the grocery store and usually I make apple chips but I felt like getting a little bit adventurous. I had the apple crisp recipe and saw my jar of salted caramel. I loooooooooooove salted caramel. I always have some on hand for frostings or just a decorative drizzle. I made some dark chocolate salted caramels for a craft fair last month as well that I am selling on Etsy (link to come)

I saw a few recipes here and there of caramel apple pies or crisps, but many of them had store bought caramel, or corn syrup in the filling which I refuse to cook with. So I just decided to experiment with my own :)

I made this dessert for visiting my BFs fire station. I cooked them some crispy tilapia and steamed/roasted veggies :)


Apple Crisple:
Serves about 8 people, or 4 hungry firefighters :)

For the filling:

6 apples*
About 3 tablespoons lemon juice
¼ cup tapioca flour
1 teaspoon cinnamon
1 teaspoon nutmeg
Homemade salted caramel to drizzle**

*I used 3 organic granny smith and 3 organic golden delicious. I didn’t peel or core them either, just sliced them on the thick setting of my mandolin. If you don’t have a mandolin, stop reading this post and buy one, you will never regret it.
**recipe at bottom :)


For the topping:

¾ cup almond flour
¾ cup gluten free rolled oats
1 teaspoon salt
1 teaspoon baking powder
½ cup cold organic butter
A handful of sliced or slivered almonds

-First assemble the apple filling. I like to use a giant plastic Tupperware style bowl with a lid so that I can shake are the contents. It’s much easier and faster and it actually does a better job than if you were to try to stir around apple slices to coat them. Place the apples in your large bowl and drizzle with lemon juice. Give a quick shake.
-Next assemble the flour, cinnamon, and nutmeg in a small separate bowl and stir, then dump into bowl. Shake the bowl for a bit until you feel all the apples have been coated and there is no free flour hanging around on the bottom of the bowl. Some will be more coated than others but this is fine. Let sit while you make the topping.
-Grab a large bowl, or something with a large surface area bottom. You will be using a pastry cutter and it’s much easier if you have enough room. Mix together the flour, oats, salt and baking powder first. Then slice up the cold butter into chunks and cut into flour mixture with a pastry cutter until all butter chunks are pea sized or smaller. Stir in the almonds.
-Choose a pan for your crisple. I used an extra large ramekin because I think that makes it look nice. It’s around the same size as a 9 inch pie pan.
-To place the apples in the pan I layered them in a spiral design. After each layer drizzle the apples with salted caramel. If you just made the caramel, it’s still liquid enough to use, however if it’s been refrigerated or sitting at room temperature, you’ll need to liquefy it. (about 20 sec in the microwave). At this point how much caramel you use is up to you :)
-After all the apples have been layered, sprinkle the topping mixture on top and place in the oven for about 40 minutes. Mine took probably about 45. Wait until the apples are nice and bubbly :)

You can add caramel sauce to the top if you want but I don’t think it needs it. This is sooooooooo good with some organic vanilla frozen yogurt. Mmmm :)

Salted Caramel:
2 cups organic sugar
1 stick organic butter
1 cup organic heavy cream
around 1 tablespoon salt, or to your taste.

If you know how to make caramel, here is my recipe. If you don't, I will be posting a video how to later :)

Cinnamon Sugar Jelly Holders

What the f are jelly holders? Not quite a donut hole, not anywhere near a cookie really, baked in a muffin pan but certainly not a muffin. They lacked a practical name that fit with what they were. When I described what they were my boss said "so, like an edible jelly holder then?" And so they are named. In all seriousness I could probably call these jelly donut holes and everyone would understand however there is no creativity in that.
I'm usually a huge fan of grape jelly, and this is the kind I used in my holders. However this one doesn’t taste quite like your average grape jelly. Still delicious. Also not a ton of added sugar which is a lovely plus.

Alright, on to the recipe. I am in the process of experimenting with recipes for my Christmas cookie plates that I intend to deliver to all my friends and certain fire stations : ) so there will be many Christmas recipes coming up. (I am aware I'm starting late compared to like, every other food blog haha)

I kind of love the monotony of this type of production, and that there is more to do to complete the treat after it is finished baking.


Jelly Holders:
Slightly adapted from hungrycouplenyc
Makes about 36 medium size, or 24 large.

Preheat oven to 375°

1 ¼ cup brown rice flour*
¼ cup tapioca flour*
2 teaspoons baking powder
½ teaspoon sea salt
½ a stick of organic butter **
½ cup sugar***
1 free range egg
1 teaspoon vanilla extract
¾ cup coconut milk****

To roll:

About 4 Tablespoons organic butter melted
Roughly ½ cup of organic white sugar
Cinnamon!

Jelly Filling:

Some jelly, I used about a cup
Some water, I didn’t even measure, just stirred it in the jelly bit by bit until it was a little more liquid. Honestly I probably wont even add water next time.


*The original recipe is not gluten free, when I alter recipes I usually use a majority of brown rice flour to ensure that it turns out. Next time I will use almond flour :)
**I actually used about 6 tablespoons because I didn’t have a full stick
***I omitted this because it is coated in sugar, and I try to avoid sugar or use only natural sugars like honey and maple syrup. These would be great with maple syrup. I now have a new idea to try :)
**** Coconut milk is my favorite, but when I make these with the almond flour I’ll use almond milk. I might also try some SO delicious NOG.

-Combine flours, baking powder and salt in a small bowl and set aside.
-Melt the butter and let cool *TIP* if you use a bowl with a larger surface area on the bottom, the butter will cool faster :)
-Once butter is cool, whisk with the sugar (if using) then whisk in the egg, milk, and vanilla until one solid color.
-Slowly add the flour mixture. It really mixes together pretty easily.
-Spray your mini muffin tin with non-stick spray. I use an organic olive oil spray with no additives; it is VERY hard to find a cooking spray that is actually decently healthy. I would avoid it all together if I wasn’t lazy :)
-Spoon batter into cups until about half full. More if you want the large size, they do puff up pretty good.
- Pop into the over for about 12 minutes, rotate your pan if they are cooking unevenly (I have a very frustrating oven sometimes)
-Once they are finished, they slide right out of the pan ready for you to start another batch.
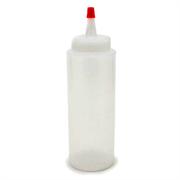
-While they are cooling, prepare your jelly mixture. Hungry Couple NYC used a piping bag, but I have these cool little squeezer bottles (below) that I think are supposed to be used for candy or something more like that, but they work perfect. And on the plus side, you can add the jelly and water in the bottle together and shake to mix :)
-Once the little balls are cooled, place the squeezer tip in the bottom of them and fill with jelly. Be sure not to squeeze hard because the jelly would just shoot through the top and then you would have to eat it right then and there because you made a mess! Ask me how I know this :)
-After they are filled with jelly, melt a bit of butter in a small bowl and grab a food brush. Also mix your cinnamon and sugar and have it close if you haven’t done that already.
-Now take each ball and paint with a bit of butter, then roll in your cinnamon and sugar.

Voila, deliciousness :)

While typing this, I was thinking about allllllllll the different ways that I can alter this recipe to make some really delicious jelly holders.

Variations:
+Almond flour, almond milk and almond extract, roll in poppy seeds, fill will lemon jelly
+Coconut oil instead of butter, roll in sugar and flaked coconut. Brush with coconut oil too. Use a mango or pineapple jelly?
+Maple syrup instead of sugar. Brush with maple instead of butter at the end too maybe. Might be too sticky. This whole maple idea can go several different ways.
+Blueberry jelly inside, substitute vanilla extract for vanilla bean paste to make a sort of vanilla bean blueberry scone type flavor.

AHH so many ideas. The lovely thing about having to roll things in sugar, is that you can have many different bowls, with many different flavored sugars to make all sorts of combos. And even different jellies, and different oils to coat them in.

I will surely be updating this later with some of these variations.

Enjoy, tell me what you think loves :)